You can easily add small backup lights to your Arcimoto. You have to make your own from parts you purchase from Amazon. Here are the steps to install assuming you have them in hand:
1. Remove the trunk. All it takes is removing 8 screws
3. Locate the small 3/4 inch plastic plugs where the backup lights will go. Remove them by gently pushing them out from the inside of the vehicle to the outside of the vehicle
4. Put the backup light into the hole from the outside. I like to remove the rubber grommet, put it into the hole, then gently put the light into the grommet.
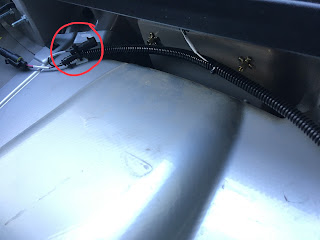
5. Plug in the lights. You should be able to find the unused plugs on each side of the inside area where the trunk used to sit inside.
6. Test the light *before* putting your trunk back
7. Put the trunk back on by placing the bottom on and tipping the top into place. Screw on with the 8 screws. You might have to gently push on the plastic sides to get the holes to align so that the screws can get started.


No comments
Post a Comment